
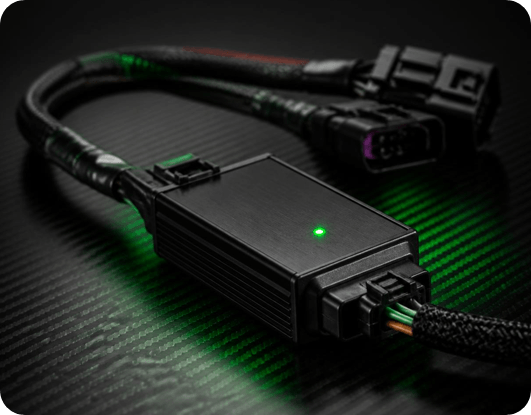

MileagePro modules are designed for a clean, straightforward installation using vehicle-specific connectors. Depending on the vehicle, the module is typically positioned behind or around the instrument cluster, allowing it to integrate with the vehicle’s existing connection points without cutting or splicing the original wiring.
Before installation: Always confirm that you have the correct MileagePro module for your exact vehicle model, generation and dashboard configuration. Installation procedures and connector layouts can vary between vehicles.
Carefully remove the trim or panels required to access the instrument cluster and its original connectors. Follow the vehicle-specific installation instructions supplied with your MileagePro module.
Connect the appropriate vehicle-specific connector to the MileagePro module as shown in the supplied installation guide.A status LED may briefly illuminate during connection, depending on the module and vehicle configuration.
Connect the remaining connector securely and check that the instrument cluster powers up normally. Make sure every connection is fully seated before continuing.
Once the connections have been checked, carefully reinstall the instrument cluster and surrounding trim. Start the vehicle and verify that the dashboard and relevant vehicle functions operate normally.
Discover vehicle-specific MileagePro modules designed for a precise, professional fit. MileagePro can provide installation guidance and support to help ensure your vehicle-specific module is fitted correctly.

Switch the vehicle off and recheck that the connectors are correctly oriented and fully inserted. Some vehicle-specific connectors may require a particular orientation.

Check the module connection and connector orientation. If the indicator still does not appear, stop the installation and contact MileagePro support before proceeding.

If unexpected warning lights, messages or electrical faults appear after installation, switch the vehicle off and recheck the installation. Do not continue using the module if the vehicle is not operating normally.
Installation requirements differ between vehicle models and generations. Always use the installation instructions supplied with your specific MileagePro module and ensure the product is used in accordance with applicable laws, regulations, vehicle requirements and manufacturer guidance.
All our mileage blockers are fully plug-and-play. No cutting wires, no soldering, no specialist tools. Most installations take under 30 minutes. Full step-by-step installation guide here.
Have a question about a MileagePro product, vehicle compatibility, or installation? Send us a message and our team will get back to you as soon as possible.
For quick answers, you can also browse our Support & FAQs or explore our product information and installation guidance.